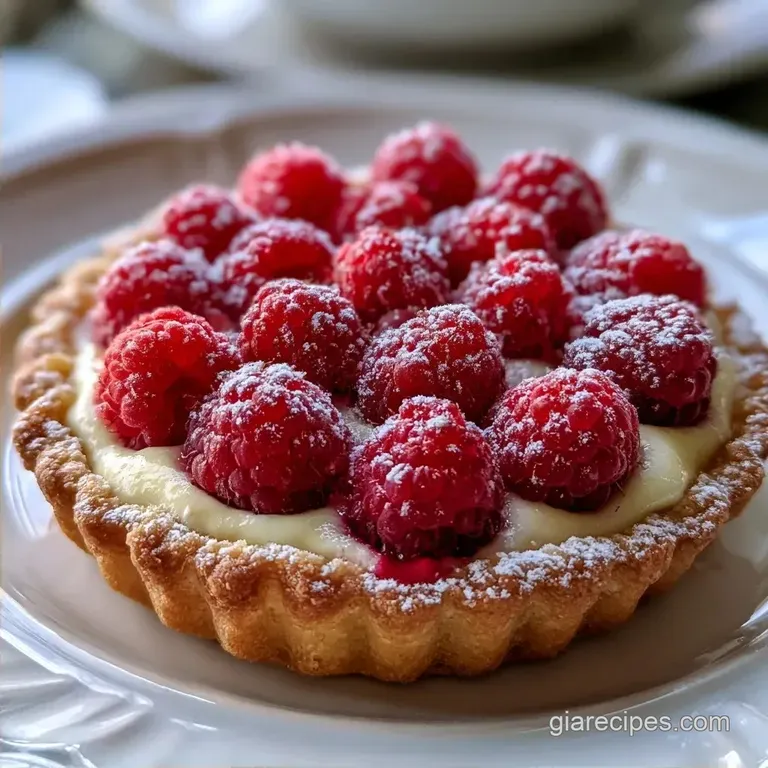
French Summer Raspberry Tart
- Time: 30 min active + 2 hr chilling
- Flavor/Texture Hook: Shattering crisp crust with a silky custard center
- Perfect for: Sunday brunch or a celebratory dinner party
- The Art of a Raspberry Tart
- Dispelling the Pastry Myth
- Basic Recipe Specs
- The Essential Building Blocks
- Necessary Baking Tools
- Bringing Everything Together
- Fixing Common Issues
- Troubleshooting Common Issues
- Creative Flavor Variations
- Preservation Secrets
- The Best Taste Pairings
- Recipe FAQs
- 📝 Recipe Card
The Art of a Raspberry Tart
Listen for that first crack. You know the one, where the pastry gives way with a distinct snap before you hit the cream. There is something about a homemade Raspberry Tart that just feels like a celebration of the season.
I remember the first time I tried making one, thinking I needed some fancy French pastry equipment to get those clean, professional edges. I spent an hour worrying about the "perfect" fold, only to realize the beauty is in the process, not the precision.
Forget the idea that you need a professional kitchen to achieve a bakery style result. Most people think you need a specialized pastry press or a temperature controlled room to keep the dough from melting. Honestly, a standard home freezer and a bit of patience are all you really need.
You don't need to be a trained chef to get that high contrast look of bright red berries against a pale, golden crust.
We're going for a classic approach here. A sweet shortcrust pastry, a thick vanilla custard, and a layer of fresh berries glazed for a professional shine. This Raspberry Tart isn't about rushing the steps.
It's about the smell of butter browning in the oven and the tactile feel of the dough coming together under your fingertips. Let's crack on.
Dispelling the Pastry Myth
The Butter Chill: Keeping the butter in 1cm cubes and chilled prevents it from merging with the flour. This creates those tiny pockets of fat that steam in the oven, making the crust shatter rather than feel like a cookie.
Starch Stability: The cornstarch binds with the milk and egg yolks during the simmer. It gives the filling enough structure to hold the berries without running across the plate.
| Method | Time | Texture | Best For |
|---|---|---|---|
| Stovetop Custard | 15 mins | Smooth and glossy | Classic tarts |
| Baked Custard | 45 mins | Set and dense | Deep dish pies |
Basic Recipe Specs
To get this right, you need a few specific checkpoints. First, make sure your butter is cut into consistent 1cm cubes so it incorporates evenly. Second, the oven must be exactly 190°C before the crust goes in.
Finally, your custard is ready when it is thicker than heavy cream and coats the back of a spoon without dripping off instantly.
Right then, let's look at what we're working. This recipe serves 8 people and takes about 185 minutes from start to finish, though most of that is just waiting for things to cool and set.
Trust me on this: do not skip the chilling time for the dough, or you'll find the sides sliding down the pan the moment they hit the heat.
The Essential Building Blocks
What Each Ingredient Does
| Ingredient | What It Does | Best Swap |
|---|---|---|
| Unsalted Butter | Provides structure and a rich, flaky crumb | Cold margarine (heavier texture) |
| Cornstarch | Thickens the filling into a stable cream | Arrowroot powder (slightly more translucent) |
| Egg Yolks | Adds richness and a golden color to the custard | Extra whole egg (less rich, lighter color) |
| Apricot Preserves | Creates a protective, glossy seal on the berries | Peach jam (similar flavor profile) |
Ingredients & Substitutes
For the Shortcrust Pastry
- 225g unsalted butter, chilled and cubedWhy this? Creates the necessary flakiness.
- 60g powdered sugarWhy this? Dissolves faster than granulated for a smoother crust.
- 190g all purpose flourWhy this? Standard protein level for a sturdy tart.
- 1.5g saltWhy this? Balances the sweetness of the pastry.
- 1 large eggWhy this? Binds the dough together.
For the Vanilla Custard
- 480ml whole milkWhy this? Higher fat content means a richer mouthfeel.
- 100g granulated sugarWhy this? Stable sweetness for the simmer.
- 30g cornstarchWhy this? Essential for the thick, sliceable texture.
- 4 large egg yolksWhy this? Provides the creamy, yellow hue.
- 28g unsalted butter, room temperatureWhy this? Adds a glossy finish to the cream.
- 5ml vanilla extractWhy this? Classic aromatic base.
For the Assembly
- 450g fresh raspberriesWhy this? The star of the Raspberry Tart.
- 60ml apricot preserves, strainedWhy this? Traditional glaze for fruit tarts.
- 15ml waterWhy this? Thins the jam for easy brushing.
Necessary Baking Tools
You don't need a mountain of gear, but a few things make this Raspberry Tart much easier. A 9 inch tart pan with a removable bottom is a must. If you use a solid pie dish, you'll be fighting to get the slices out without them crumbling.
You'll also want some parchment paper and pie weights. If you don't have actual weights, dried beans or uncooked rice work just as well. The weights keep the crust from bubbling up in the center, which is the most common reason these tarts look messy.
A fine mesh strainer for the apricot glaze is also helpful to remove any fruit chunks that would ruin the smooth look.
Bringing Everything Together

Phase 1: Crafting the Shattering Crust
- Mix the 190g flour, 60g powdered sugar, and 1.5g salt in a bowl. Rub in the 225g chilled butter using your fingertips until the mixture looks like coarse crumbs. Note: Don't let the butter melt into a paste.
- Stir in the egg until the dough just comes together. Stop mixing the moment it forms a ball to keep the crust tender.
- Press the dough into your tart pan and trim the edges. Freeze for 30 minutes until the dough is firm to the touch.
- Line the crust with parchment and weights. Bake at 190°C for 15 minutes, remove weights, and bake another 5-10 minutes until the bottom is a pale golden brown. Let it cool completely.
Phase 2: Simmering the Custard
- Heat the 480ml milk in a saucepan over medium heat until it reaches a gentle simmer.
- Whisk 100g sugar, 30g cornstarch, and 4 egg yolks in a bowl until smooth and pale.
- Slowly pour a bit of the hot milk into the egg mixture while whisking. This prevents the eggs from scrambling.
- Return the whole mixture to the pan. Cook over medium heat, whisking constantly until the custard thickens and bubbles.
- Remove from heat and stir in 28g room temperature butter and 5ml vanilla extract until the cream is glossy.
Phase 3: The Final Assembly
- Spread the cooled custard evenly into the baked crust.
- Arrange the 450g fresh raspberries on top of the cream. Press them in slightly so they stay put.
- Heat the 60ml apricot preserves and 15ml water in a small pot until liquid and bubbling.
- Brush the glaze over the berries until they have a shiny, reflective coat.
Chef's Note: To get a truly professional look, use a small offset spatula to smooth the custard. If you see air bubbles, just pop them with a toothpick before adding the berries.
Fixing Common Issues
When making a Raspberry Tart, things can go sideways if the temperature isn't right. The most frequent complaint is a "soggy bottom," which usually happens because the crust wasn't blind baked long enough or the custard was added while still hot.
Troubleshooting Common Issues
| Issue | Solution |
|---|---|
| Why Your Crust Shrinks | If the walls of your tart slide down during baking, you likely overworked the dough. This develops too much gluten, which snaps back like a rubber band when heated. |
| Why Your Custard Is Lumpy | Lumps usually happen if the milk was added too quickly to the eggs or if the heat was too high. If this happens, don't panic. |
| Why Your Berries Leak | If the raspberries release too much juice, they might be overripe or were washed too early. Always pat your berries dry with a paper towel before placing them on the custard. |
Creative Flavor Variations
If you want to switch things up, the Raspberry Tart is a great base for other flavors. For a more decadent version, you can spread a thin layer of melted dark chocolate on the bottom of the crust before adding the custard. This creates a hidden layer of richness that pairs beautifully with the tart fruit.
For those who prefer something more rustic, you might enjoy a Raspberry Cobbler recipe instead of a structured tart. If you're feeling adventurous, try replacing the vanilla in the custard with a hint of almond extract. The almond and raspberry combination is a classic for a reason.
Decision Shortcut:
- If you want a crispier base, blind bake for an extra 5 minutes.
- If you prefer a tangier filling, add a squeeze of lemon juice to the custard.
- If you're serving a crowd, bake two crusts side by-side.
Preservation Secrets
The Raspberry Tart is best served fresh, but it keeps well if stored correctly. Keep it in the fridge, covered loosely with plastic wrap to avoid sticking to the glaze. It will stay fresh for about 3 days.
You can't really freeze the assembled tart because the berries will break down and the custard will lose its texture. However, you can freeze the baked crust for up to two months. Just wrap it tightly in foil and thaw it in the fridge overnight before filling it.
To reduce waste, save any leftover raspberry stems or bruised berries. You can simmer them with a bit of sugar and water to make a simple syrup for pancakes or cocktails. If you have extra custard, it makes a great filling for cream puffs or a topping for fresh sliced peaches.
The Best Taste Pairings
Since the Raspberry Tart is quite rich, you want something to cut through the sweetness. A glass of chilled Prosecco or a crisp Sauvignon Blanc works wonders. The acidity in the wine balances the butter in the crust and the creaminess of the custard.
For a non alcoholic option, a tart Earl Grey tea is a great choice. The bergamot notes in the tea highlight the floral qualities of the raspberries. If you're looking for another light berry treat to serve alongside, check out my Raspberry Fool recipe.
Plating for Every Occasion
Depending on who you're serving, you can change how you present this dish.
| Level | Style | Plating Tweak |
|---|---|---|
| Simple | Homey | Sliced wedges on a plain white plate |
| Polished | Dinner Party | Glazed berries with a dusting of powdered sugar |
| Restaurant | Professional | Single slice, offset, with 3 dots of whipped cream |
Right then, you've got everything you need. This Raspberry Tart takes a bit of patience, but the result is something you can be proud of. Just remember to keep that butter cold and your berries dry. Happy baking!
Recipe FAQs
How to make raspberry puree?
Blend fresh raspberries in a food processor. Press the mixture through a fine mesh sieve to remove the seeds for a smooth consistency.
Should you wash fresh raspberries or just eat them?
Wash them gently, but pat them dry. Moisture on the surface can cause the berries to leak juice and make the tart soggy.
What can you make with fresh raspberries?
Fresh raspberries are perfect for this tart, jams, or fresh salads. They add a tart contrast to sweet pastry and creamy fillings.
Why did my tart crust shrink during baking?
You likely overworked the dough. This develops too much gluten, which causes the walls of the tart to snap back like a rubber band when heated.
How to fix lumpy custard?
Whisk the mixture vigorously or pass it through a fine strainer. If you mastered the smooth consistency here, the same principle applies to our chocolate eclair dessert.
Is it true that I can skip freezing the dough before baking?
No, this is a common misconception. Freezing the dough for 30 minutes ensures the crust holds its shape and prevents it from shrinking in the oven.
How to prevent raspberries from leaking juice?
Pat your berries dry with a paper towel before adding them to the tart. Ensure they are not overripe, as softer berries release more liquid.
Raspberry Tart With Custard

