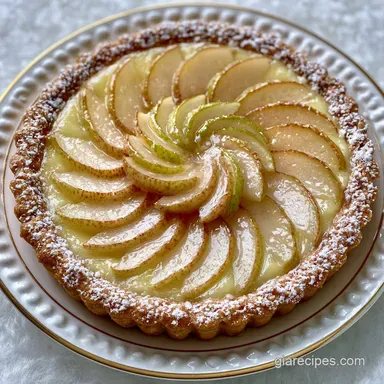
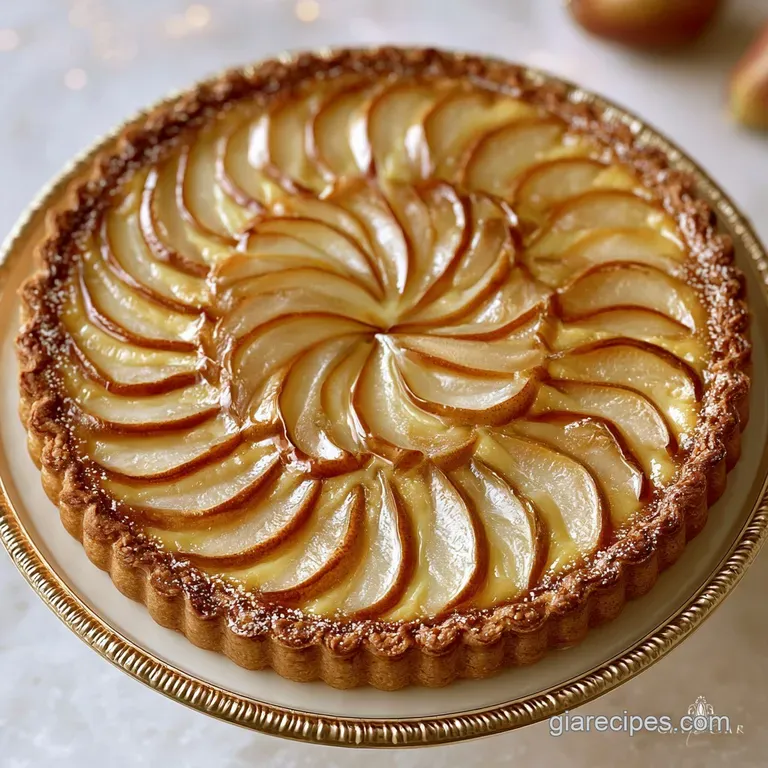
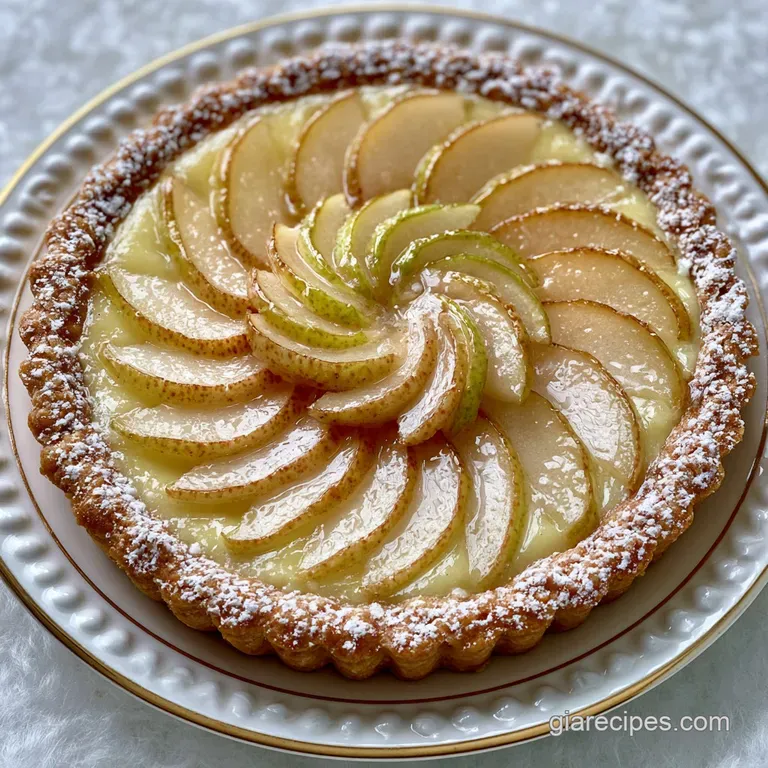
Homemade Pear Custard Pie: Silky Filling
- Time: 20 min active + 60 min baking = Total 80 mins
- Flavor/Texture Hook: Shattering buttery crust with a silky, nutmeg scented filling
- Perfect for: Autumn dinner parties or a cozy Sunday dessert
- Homemade Pear Custard Pie
- Why This Works
- Comparing Baking Methods
- Component Analysis
- Shopping List Breakdown
- Equipment Needed
- From Prep to Plate
- What Can Go Wrong (and How to Fix It)
- Adjusting the Recipe Size
- Common Kitchen Misconceptions
- Storage Guidelines
- Flavor Pairing Ideas
- Recipe FAQs
- 📝 Recipe Card
Homemade Pear Custard Pie
That first scent of warm cinnamon and softened pears hitting the air is honestly like a hug for your kitchen. I remember the first time I tried this, I was convinced that you needed some kind of professional pastry degree or a fancy French oven to get the texture right.
I thought the custard would either be a runny mess or turn into a rubbery omelet, but the secret is all in the temperature and the patience of the bake.
Forget the myth that you need expensive, specialty Bosc pears to make this work. I've found that the standard pears from your local grocer, as long as they're just barely ripe, actually hold their shape better in the oven.
This homemade pear custard pie isn't about being fancy, it's about that contrast between the crisp, salty crust and the smooth, sweet center.
You can expect a dessert that feels heirloom but is actually quite approachable. We're going for a velvety finish that doesn't collapse when you slice into it. It's a slow down kind of recipe, where the magic happens in the quiet minutes while the pie sets in the oven.
Why This Works
Understanding the "how" makes the "do" so much easier. Here is the logic behind the steps:
- The Blind Bake: Baking the crust alone first creates a moisture barrier, so the pear juices don't soak into the dough.
- Lemon Acid: A splash of lemon juice stops the pears from turning brown and cuts through the richness of the heavy cream.
- Sugar Egg Bond: Whisking sugar into eggs before adding liquids ensures the sugar dissolves completely, preventing those little grainy bits in your custard.
- Slow Set: Baking at a moderate temperature allows the eggs to coagulate slowly, which is how we get that silky texture instead of a bubbly, overcooked one.
Comparing Baking Methods
Depending on how much time you have, you might choose different paths. Here is how the classic way stacks up against a rushed version.
| Feature | Fast Method (store-bought) | Classic Homemade | Impact on Result |
|---|---|---|---|
| Crust Texture | Uniform and dense | Flaky and shattering | Huge difference in mouthfeel |
| Flavor Control | Often too salty/sweet | Balanced and buttery | You control the sugar levels |
| Prep Time | 10 mins active | 20 mins active | Slightly more effort for better taste |
Right then, let's look at what actually makes the ingredients play nice together. If you've ever made a Zucchini Quiche recipe, you'll notice the blind baking technique is very similar here to keep the base dry.
Component Analysis
| Ingredient | Science Role | Pro Secret |
|---|---|---|
| Chilled Butter | Creates steam pockets | Keep it frozen for 10 mins before cubing |
| Heavy Cream | Adds fat for silkiness | Don't over whisk or it'll get too airy |
| Eggs | The structural binder | Use room temperature eggs for better mixing |
| Lemon Juice | pH balancer | Toss pears immediately after slicing |
Shopping List Breakdown
For the crust, you'll need a few staples. Grab a high-quality unsalted butter so you can control the salt yourself.
- All purpose flour (190 g) - Why this? Standard protein level for a sturdy but flaky crust
- Substitute: White whole wheat flour (adds nuttiness, but crust is denser)
- Unsalted butter, chilled and cubed (115 g) - Why this? Cold fat is the only way to get flakes
- Substitute: Vegetable shortening (more flake, but less flavor)
- Salt (3 g) - Why this? Enhances the butter flavor
- Substitute: Kosher salt (adjust amount slightly)
- Ice water (15 ml) - Why this? Binds flour without melting butter
- Substitute: Ice cold vodka (reduces gluten for a more tender crust)
Now for the filling, where the flavor really lives.
- Peeled and thinly sliced pears (450 g) - Why this? Natural sweetness and soft texture
- Substitute: Apples (firmer bite, slightly more tart)
- Lemon juice (15 g) - Why this? Prevents oxidation of fruit
- Substitute: Apple cider vinegar (similar acidity, different tang)
- Granulated sugar (50 g for pears, 150 g for custard) - Why this? Sweetens and stabilizes the eggs
- Substitute: Maple syrup (adds depth, but makes custard thinner)
- Large eggs (3) - Why this? Creates the custard structure
- Substitute: 3 large egg yolks + 1 white (richer, more yellow color)
- Heavy cream (240 ml) - Why this? Essential for the velvety mouthfeel
- Substitute: Full fat coconut milk (nutty flavor, slightly less stable)
- Whole milk (120 ml) - Why this? Thins the cream so it's not too heavy
- Substitute: Evaporated milk (makes a denser, more old-fashioned custard)
- Vanilla extract (5 ml) - Why this? Classic aromatic base
- Substitute: Almond extract (stronger, more "marzipan" flavor)
- Ground cinnamon (1 g) - Why this? Warmth that complements pear
- Substitute: Ground allspice (more complex, wintery scent)
- Ground nutmeg (0.5 g) - Why this? Adds a subtle, woody note
- Substitute: Mace (similar but milder)
Equipment Needed
You don't need a professional kitchen, but a few specific tools make this homemade pear custard pie much easier. A 9 inch pie dish is the standard, and I prefer glass so I can peek at the bottom of the crust while it's baking.
A rolling pin is a must, but if you don't have one, a smooth wine bottle works in a pinch. You'll also need parchment paper and some pie weights (or dried beans) for the blind bake.
If you're using a stand mixer such as KitchenAid, you can pulse the crust ingredients in the food processor attachment to keep the butter cold.
Finally,, a fine mesh strainer is a hidden gem here. Pouring the custard through a strainer removes any stray egg bits, ensuring that silky finish we're after.
From Prep to Plate
Let's get into it. Take your time with the dough, and don't overwork it, or you'll lose those beautiful flakes.
Phase 1: Preparing the Base
- Combine flour, salt, and chilled butter in a bowl. Pulse or rub with your fingers until it looks like coarse crumbs.
- Stir in ice water one tablespoon at a time until the dough just holds together. Note: Don't over mix or the crust will be tough.
- Roll out the dough on a floured surface and fit it into the pie dish. Trim the overhang and crimp the edges.
- Line with parchment paper and weights, then bake at 375°F (190°C) for 12 minutes.
- Remove weights and bake for another 5 minutes until the base looks dry and matte.
Phase 2: Building the Fruit Architecture
- Toss sliced pears in lemon juice and 50 g of sugar.
- Arrange 2 cups of pears in a tight, circular layer at the bottom of the pre baked crust. Note: Pack them close together so they don't float too much.
Phase 3: The Custard Pour and Bake
- Whisk eggs and 150 g sugar until the mixture is pale and fluffy.
- Slowly stir in cream, milk, vanilla, cinnamon, and nutmeg.
- Carefully pour the mixture over the pears, filling to just below the rim.
- Bake at 350°F (175°C) for 40-45 minutes until the edges are set but the center has a slight jiggle.
Chef's Note: For a stunning presentation, I love adding a color balance strategy. Add a sprinkle of bright red pomegranate seeds or a few fresh green mint leaves on top after the pie cools. A dusting of golden brown toasted almonds adds a crunch that contrasts the velvety custard.
What Can Go Wrong (and How to Fix It)
Even the most experienced cooks hit a snag now and then. If your homemade pear custard pie isn't behaving, it's usually a temperature or moisture issue.
Why Your Custard Cracks on Top
Usually, this happens because the oven was too hot or you over whisked the eggs, incorporating too much air. The custard rises like a soufflé and then collapses. Keep your oven at 350°F and stir the custard gently.
If the Pears Are Too Watery
This happens if the pears were overripe or didn't have enough time to macerate with the sugar. The juice leaks into the custard and creates a layer of liquid. To fix this, pat the pears dry with a paper towel before placing them in the crust.
Why Your Crust Is Soggy
If you skipped the blind bake or didn't bake the base until it was matte, the custard will soak into the dough. Always ensure that base is dry before adding filling.
| Problem | Root Cause | Solution |
|---|---|---|
| Rubbery Texture | Overbaked custard | Pull out when center still jiggles |
| Pears Floating | Pears too sparse | Pack pear slices tighter in the base |
| Crust Shrinking | Dough not rested | Chill dough 30 mins before rolling |
Common Mistakes Checklist
- ✓ Using room temperature butter (must be chilled!)
- ✓ Mixing the custard too vigorously (keep it smooth, not foamy)
- ✓ Using a temperature higher than 350°F for the final bake
- ✓ Adding too much water to the crust (it should just barely cling)
- ✓ Forgetting to peel the pears (the skin is too tough for custard)
Adjusting the Recipe Size
When you're making a homemade pear custard pie, you might not always need a full 9 inch pie. Here is how to adjust.
Scaling Down (½ Recipe) Use a 6 inch tart pan. Reduce the baking time for the custard by about 20%, as the smaller volume sets faster. For the egg, beat one egg in a small bowl and use exactly half.
Scaling Up (2x Recipe) Work in batches for the crust to keep the butter cold. For the filling, do not double the cinnamon and nutmeg; increase them to 1.5x only, as these spices can become overpowering in large volumes.
If baking two pies at once, lower the oven temperature by 25°F and extend the time by 10 minutes to ensure even heat distribution.
Since you're already in the mood for something creamy, you might love my Chocolate Eclair Dessert for a different take on a custard based treat.
Common Kitchen Misconceptions
There are a few things people often tell you about custard pies that just aren't true.
First, some say you must use a specific type of pear like Anjou or Bosc for the "best" results. While different pears have different flavor profiles, the real secret is the ripeness. A slightly under ripe pear holds its shape, whereas a very ripe one turns to mush.
Second, many believe that you have to "blind bake" for an hour to prevent a soggy bottom. In reality, 15-17 minutes at the right temperature is plenty to seal the crust. Anything more and you're just cooking the crust twice, which ruins the flaky texture.
Storage Guidelines
Once your homemade pear custard pie has cooled completely, it needs to stay chilled. The eggs and cream make it perishable, so don't leave it on the counter for more than two hours.
Fridge Storage Cover the pie loosely with plastic wrap or place it in an airtight container. It will stay fresh and velvety for 3-4 days. I actually think it tastes better on day two because the spices have more time to meld.
Freezing I don't recommend freezing the entire pie, as the custard can separate and become grainy. However, you can freeze the pre baked crusts for up to 3 months. Wrap them tightly in foil and thaw in the fridge overnight before filling.
Zero Waste Tips Don't toss those pear peels and cores! Simmer them with a cinnamon stick and a bit of water to make a quick pear syrup. You can drizzle this over the final slices of pie or stir it into your morning oatmeal for a little bit of luxury.
Flavor Pairing Ideas
The sweetness of the pear and the richness of the custard are a great base, but a few additions can really make this dish shine.
The Gourmet Contrast Try serving a slice with a dollop of crème fraîche or a sharp piece of aged cheddar cheese on the side. The acidity and saltiness of the cheese cut through the creaminess of the homemade pear custard pie in a way that is surprisingly addictive.
The Sweet Addition A drizzle of salted caramel or a handful of fresh raspberries provides a bright, tart pop of color and flavor. If you want something more subtle, a light dusting of powdered sugar and a grating of fresh nutmeg right before serving adds a professional touch.
The Beverage Match A glass of chilled Prosecco or a warm spiced cider pairs beautifully here. The bubbles in the sparkling wine cleanse the palate between bites of the rich custard, while the cider leans into the autumnal vibes of the pears.
Recipe FAQs
Which types of pears work best for this custard pie?
Bosc or Anjou pears. These varieties are firm and hold their shape well during the 350°F baking process.
Why did the top of my custard crack?
Overbaking or excessive heat. The egg-based custard can tighten and split if it cooks too quickly or remains in the oven too long.
How to avoid a soggy bottom crust?
Blind bake the dough. Bake at 375°F (190°C) for 12 minutes with weights and another 5 minutes without until the base looks dry and matte.
How to know when the pear custard pie is fully baked?
Gently shake the pan. The edges should be set, but the center should still maintain a slight, jelly like wobble.
Is it true that I can slice and serve this pie immediately after baking?
No, this is a common misconception. Slicing the pie while hot will cause the custard to run; it must cool completely to set properly.
How to stop the pear slices from floating to the top?
Arrange the pears in a tight, circular layer. Packing the fruit closely at the bottom of the crust prevents slices from shifting when the liquid is poured.
Can I use this same crust technique for other fruit pies?
Yes, blind baking is a universal technique for custard and fruit tarts. For a completely different dessert approach, see how we use a chilled base in our chocolate cheesecake.
Homemade Pear Custard Pie