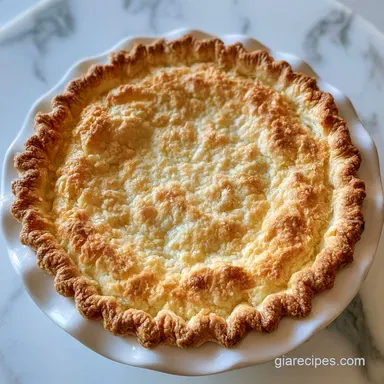
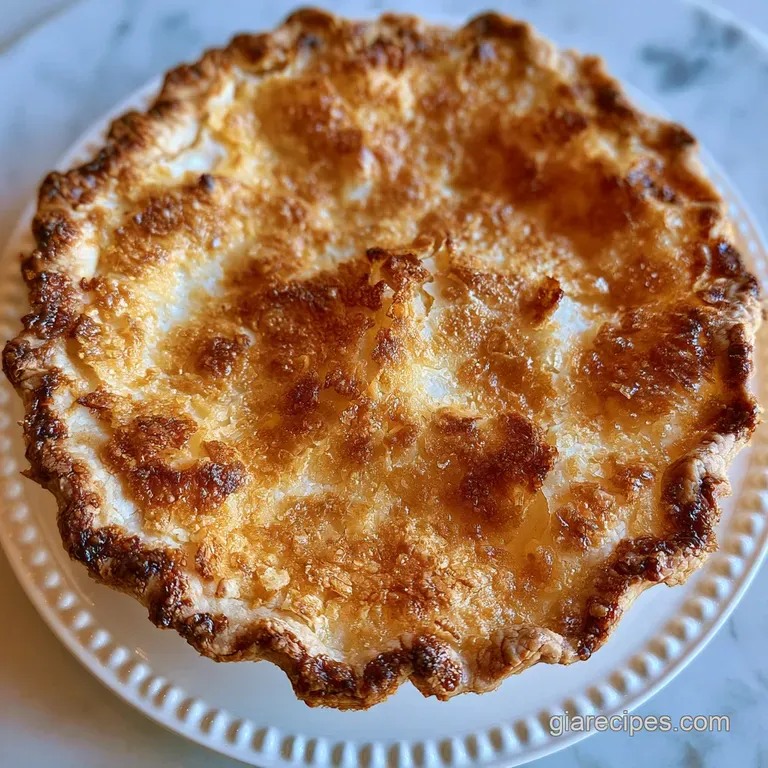
Classic Crisco Pie Crust: Flaky and Golden
- Time: 15 min active + 1 hour chilling = Total 1 hours 35 mins
- Flavor/Texture Hook: Mahogany gold edges with a crisp, flaky shatter
- Perfect for: Holiday fruit pies, heirloom tarts, and beginner bakers
Imagine the sound of a fork piercing a golden brown crust - that distinct, crystalline shatter that tells you the bake was a success. I remember the first time I tried to make a pie for a family reunion.
I used butter, and while it tasted rich, the crust slumped and shrank, leaving me with a sad, shriveled ring of pastry. It felt like I was fighting the dough rather than working with it.
Then I went back to the basics. I pulled out the shortening, the same stuff my grandmother used, and everything changed. The texture became predictable, stable, and incredibly light.
There is something almost magical about the way the dough transforms from a shaggy clump into a velvety sheet that glides right into the pie pan.
If you want a crust that doesn't shrink and stays crisp even under a heavy fruit filling, you're in the right place. We're making a classic crisco pie crust that celebrates the art of traditional baking.
It's approachable, reliable, and honestly, once you see how easy it is to handle, you'll wonder why you ever struggled with more temperamental fats.
Classic Crisco Pie Crust
The beauty of using shortening is the high melting point. Unlike butter, which starts to soften the moment it hits your fingertips, shortening stays firm. This means those little pockets of fat stay intact until they hit the heat of the oven, where they vanish into steam and push the flour layers apart.
Trust me on this, the patience you put into the chilling phase is where the real magic happens. When the dough rests, the gluten relaxes and the flour fully hydrates. If you skip the fridge, you're asking for a tough crust that shrinks away from the edges. We want a crust that stands tall and proud.
Whether you're filling this with a tart apple mix or a creamy custard, this base provides the structural integrity you need. It's an heirloom technique that focuses on texture over everything else. Let's crack on and get your kitchen smelling like a professional bakery.
The Fat Logic
Fat Barrier: Shortening doesn't contain water, which prevents the flour from developing too much gluten. This keeps the crust tender instead of chewy.
Steam Pockets: Because the fat stays in distinct lumps, it creates tiny voids during baking. These voids expand into the flaky layers we love.
Melting Point: Shortening melts at a higher temperature than butter. This allows the crust to hold its shape and height as it bakes.
Hydration Control: Using ice cold water ensures the fat doesn't melt during the mixing process. This preserves the "pea sized" lumps essential for flakiness.
| Feature | Homemade Shortening Crust | store-bought Frozen |
|---|---|---|
| Texture | Shattering and airy | Often dense or waxy |
| Control | You adjust the salt/sugar | Fixed ingredients |
| Stability | High - resists shrinking | Moderate - can slump |
| Effort | 15 min active work | Zero active work |
Ingredient Deep Dive
| Ingredient | Science Role | Pro Secret |
|---|---|---|
| All purpose flour | Provides the structure | Chill the flour in the freezer for 10 mins first |
| Vegetable shortening | Creates the flakes | Keep it refrigerated until the exact second you need it |
| Ice cold water | Binds the dough | Use a spray bottle for precision adding |
| Salt | Tightens gluten | Use table salt for a more even distribution |
Gathering Your Essentials
For this recipe, you only need a few basic pantry staples. The quality of your flour and the temperature of your fat are the two things that will make or break the outcome.
- 2.5 cups (315g) All purpose flour Why this? Standard protein level for a balance of strength and tenderness
- 1 cup (225g) vegetable shortening Why this? Highest stability and flakiness
- 1 tsp (6g) salt Why this? Balances the richness of the fat
- 6 tbsp (90ml) ice cold water Why this? Binds without melting the fat
- 1 tbsp (8g) granulated sugar (optional) Why this? Helps with browning for sweet pies
- 1 egg, beaten with 1 tbsp water (optional) Why this? Creates a mahogany gold finish
| Original Ingredient | Substitute | Why It Works |
|---|---|---|
| Vegetable Shortening | Unsalted Butter (cold) | Similar fat content. Note: Flakiness decreases and dough becomes harder to handle |
| All purpose Flour | Pastry Flour | Lower protein. Note: Results in a more tender, crumbly crust |
| Ice Water | Apple Cider (cold) | Adds a fruity tang. Note: May slightly alter the structural stability |
Right then, make sure your water is truly ice cold. I actually like to put a few ice cubes in the measuring cup to ensure there's no room for warmth.
Necessary Tools
You don't need a professional kitchen to get a professional result. A few simple tools will do the trick, though a pastry blender is a nice to have.
- A large, chilled mixing bowl (glass or stainless steel)
- Pastry blender or two sturdy forks
- Plastic wrap for chilling
- Rolling pin
- Flour for dusting your surface
- Pie plate (9 inch is standard)
- Parchment paper and pie weights (for blind baking)
Making the Dough

Let's get into the actual process. The goal here is to keep everything cold. If you feel the dough getting warm, don't be afraid to pop it back in the fridge for 10 minutes.
Phase 1: Integrating the Fat
- Combine the flour and salt in a chilled mixing bowl. Note: Mixing these first ensures the salt doesn't clump.
- Add the cold vegetable shortening. Use a pastry blender or forks to work it into the flour until the mixture resembles coarse crumbs with a few pea sized lumps remaining. Note: Do not overmix; those lumps are your flake insurance.
Phase 2: Binding the Dough
- Add ice water one tablespoon at a time. Toss with a fork after each addition until the dough begins to clump together.
- Squeeze a small handful of dough. It should hold its shape without being sticky. Note: Stop adding water the moment it holds together.
Phase 3: The Chill and Roll
- Divide the dough into two equal disks. Wrap them tightly in plastic wrap and refrigerate for at least 1 hour. Note: This lets the gluten relax so the crust doesn't shrink.
- On a floured surface, roll the dough from the center outward. Transfer it gently to your pie plate.
Phase 4: Baking and Finishing
- For a blind bake, line the crust with parchment and pie weights. Bake at 425°F (218°C) for 15-20 minutes until the edges are set and matte.
- Brush the edges with egg wash and sprinkle with sugar. Bake for another 5-10 minutes until the edges are mahogany gold.
Chef's Tip: To get a truly professional edge, use your thumb to gently press a "fluted" pattern into the rim before baking. It adds an heirloom touch that looks stunning on a dinner table.
Fixing Common Issues
The most common frustration with a classic crisco pie crust is the texture - either it's too tough or it's falling apart. Most of these issues come down to temperature or handling.
Troubleshooting Common Issues
| Issue | Solution |
|---|---|
| Why Your Crust Shrinks | This usually happens because the dough was rolled too tight or didn't rest long enough. When the gluten is "tense," it snaps back during baking. Let the dough rest for 15 minutes in the pan before it |
| Why the Dough is Sticky | Too much water is the culprit here. If the dough sticks to your rolling pin, resist the urge to dump heaps of flour on it, as this can make the crust tough. Instead, chill the dough for another 20 min |
| Why the Bottom is Soggy | This happens when the filling releases moisture before the crust can set. Blind baking (pre baking the crust) is the best defense. If you're not blind baking, brush the bottom with a thin layer of bea |
Common Mistakes Checklist:
- ✓ Did you keep the shortening cold until the last second?
- ✓ Are there still visible pea sized lumps of fat in the flour?
- ✓ Did you chill the disks for at least 1 hour?
- ✓ Did you avoid kneading the dough like bread?
- ✓ Is your oven fully preheated to 218°C?
Adjusting the Batch
You might not always need two full crusts. Here is how to handle different quantities without ruining the ratio.
Scaling Down (½ Batch): If you only need one crust, halve everything. Use 1.25 cups of flour and ½ cup of shortening. Since you're working with less mass, the water might evaporate faster - be very cautious and add it half a tablespoon at a time. Your chill time remains the same.
Scaling Up (2x-4x Batch): When doubling or tripling, don't just dump everything into one bowl. Work in batches. If you use a stand mixer such as a KitchenAid, use the paddle attachment on the lowest speed for only 30 seconds.
For salt and sugar, only increase them to 1.5x the original ratio to avoid over seasoning.
Baking Adjustments: If you are baking multiple pies at once, lower the oven temperature by 25°F (approx 15°C) to ensure even airflow and extend the bake time by 5-10 minutes.
Variations and Swaps
Once you've nailed the classic crisco pie crust, you can start playing with flavors. The beauty of shortening is that it's a neutral canvas.
Savory Herb Crust: For a chicken or vegetable pot pie, add 1 tablespoon of dried thyme or rosemary to the flour. I also like to add a pinch of smoked paprika for a deeper, earthier tone. This pairs beautifully with a savory filling, or if you're looking for something different, try a Chicken Pot Pie Orzo for those nights when you want the flavor without the rolling.
Sweetened Fruit Base: For apple or berry pies, the 1 tablespoon of sugar is essential. It doesn't just add sweetness; it helps the crust caramelize. This is the ideal base for a Pear Custard Pie, where the crispness of the crust balances the silky filling.
Butter Flavored Twist: If you miss the taste of butter but want the stability of shortening, use butter flavored shortening. It's a great middle ground that gives you that nostalgic aroma while maintaining the shatteringly flaky texture.
Storage and Waste
Don't let your leftover scraps go to waste. There's plenty you can do with the trimmings from your rolling process.
Storage Guidelines: - Fridge: Wrap disks tightly in plastic and store for up to 3 days. - Freezer: Wrap in plastic then foil. They stay fresh for 3 months. Thaw in the fridge overnight before rolling.
Zero Waste Tips: Take your dough scraps, roll them out thin, sprinkle with cinnamon sugar, and bake them at 425°F for 8 minutes. You've just made "pie crust crackers" - a great snack while you wait for the actual pie to cool.
If you have leftover shortening, use it to grease your baking pans for cakes or brownies.
Pairing Ideas
A great crust is only half the battle. The pairing determines the occasion. For a cozy Sunday brunch, this crust is a dream for a rustic galette with seasonal peaches. For a formal holiday dinner, a deep dish apple pie with a lattice top is the gold standard.
If you're serving a heavy, rich pie, pair it with something light and acidic on the side - a fresh berry coulis or a dollop of unsweetened crème fraîche. The tartness cuts through the richness of the shortening and cleanses the palate between bites.
Since this crust is so versatile, it also works for savory tarts. Try filling it with caramelized onions and goat cheese for a sophisticated appetizer. The mahogany gold edges of the crust make any dish look like it came from a high end patisserie, but with the warmth and love of a homemade kitchen.
Recipe FAQs
How do you make old fashioned Crisco shortening pie crust?
Combine flour and salt in a chilled bowl, then work in cold shortening until coarse crumbs form. Stir in ice water until the dough holds its shape, then refrigerate for at least one hour before rolling.
How long do you bake a Crisco pie crust?
Bake for 15-20 minutes at 425°F (218°C) for a blind bake. You can optionally brush the edges with egg wash and sprinkle with sugar for a mahogany gold finish.
Is it better to use butter or Crisco for pie crust?
Crisco is recommended for maximum flakiness. Vegetable shortening has a higher melting point, which prevents the crust from collapsing and ensures a more consistent lift.
What is the secret to the best pie crust?
Keep all ingredients ice-cold and leave pea-sized lumps of shortening in the dough. These fat pockets create steam during baking to lift the layers. If you enjoyed mastering this texture, see how the same principle works in these apple pie bombs.
Why does my pie crust shrink during baking?
The dough was likely rolled too tight or did not rest long enough. Allow the dough to rest in the pie plate for 15 minutes before baking to relax the gluten and prevent it from snapping back.
Is it true that I should knead the dough until it is perfectly smooth?
No, this is a common misconception. Over kneading develops too much gluten, which transforms a flaky, tender crust into a tough, bread like texture.
How do I store leftover pie crust dough?
Wrap disks tightly in plastic and refrigerate for up to 3 days. For longer storage, wrap them in plastic then foil and freeze for up to 3 months, thawing in the fridge overnight.
Classic Crisco Pie Crust